Nexus 是一个用于专门搭建 Maven 仓库的软件,除了作为 Maven 仓库,它还能够作为 Docker 镜像仓库、Yum 仓库等等。
Nexus 部署
deploy.yaml
1
2
3
4
5
6
7
8
9
10
11
12
13
14
15
16
17
18
19
20
21
22
23
24
25
26
27
28
29
30
31
32
33
34
35
36
37
38
39
40
41
42
43
44
45
46
47
48
49
50
51
52
53
54
55
56
57
58
59
60
61
62
63
64
65
66
67
68
69
| apiVersion: apps/v1
kind: Deployment
metadata:
creationTimestamp: null
labels:
app: nexus
name: nexus
spec:
replicas: 1
selector:
matchLabels:
app: nexus
strategy: {}
template:
metadata:
creationTimestamp: null
labels:
app: nexus
spec:
initContainers:
- name: volume-mount-hack
image: busybox:latest
command:
- sh
- '-c'
- 'chown -R 200:200 /nexus-data'
volumeMounts:
- name: nexus-data
mountPath: /nexus-data
containers:
- image: sonatype/nexus3:3.37.3
name: nexus
ports:
- containerPort: 8081
env:
- name: INSTALL4J_ADD_VM_PARAMS
value: "-Xms2703m -Xmx2703m -XX:MaxDirectMemorySize=2703m -Djava.util.prefs.userRoot=${NEXUS_DATA}/javaprefs"
resources:
limits:
cpu: 2000m
memory: 2048Mi
requests:
cpu: 2000m
memory: 2048Mi
volumeMounts:
- name: nexus-data
mountPath: /nexus-data
volumes:
- name: nexus-data
persistentVolumeClaim:
claimName: nexus-data
---
apiVersion: v1
kind: Service
metadata:
name: nexus
labels:
app: nexus
spec:
type: NodePort
ports:
- name: nexus
port: 8081
targetPort: 8081
protocol: TCP
selector:
app: nexus
|
部署后,在容器内部获取 admin 密码
1
| echo $(cat /nexus-data/admin.password)
|
默认仓库说明
- maven-central:中央仓库,默认从
https://repo1.maven.org/maven2/ 拉取 jar 包
- maven-releases:私库发行 jar,建议将设置改为
Allow redeploy
- maven-snapshots:私库快照 jar,即库中的 jar 均为调试版本
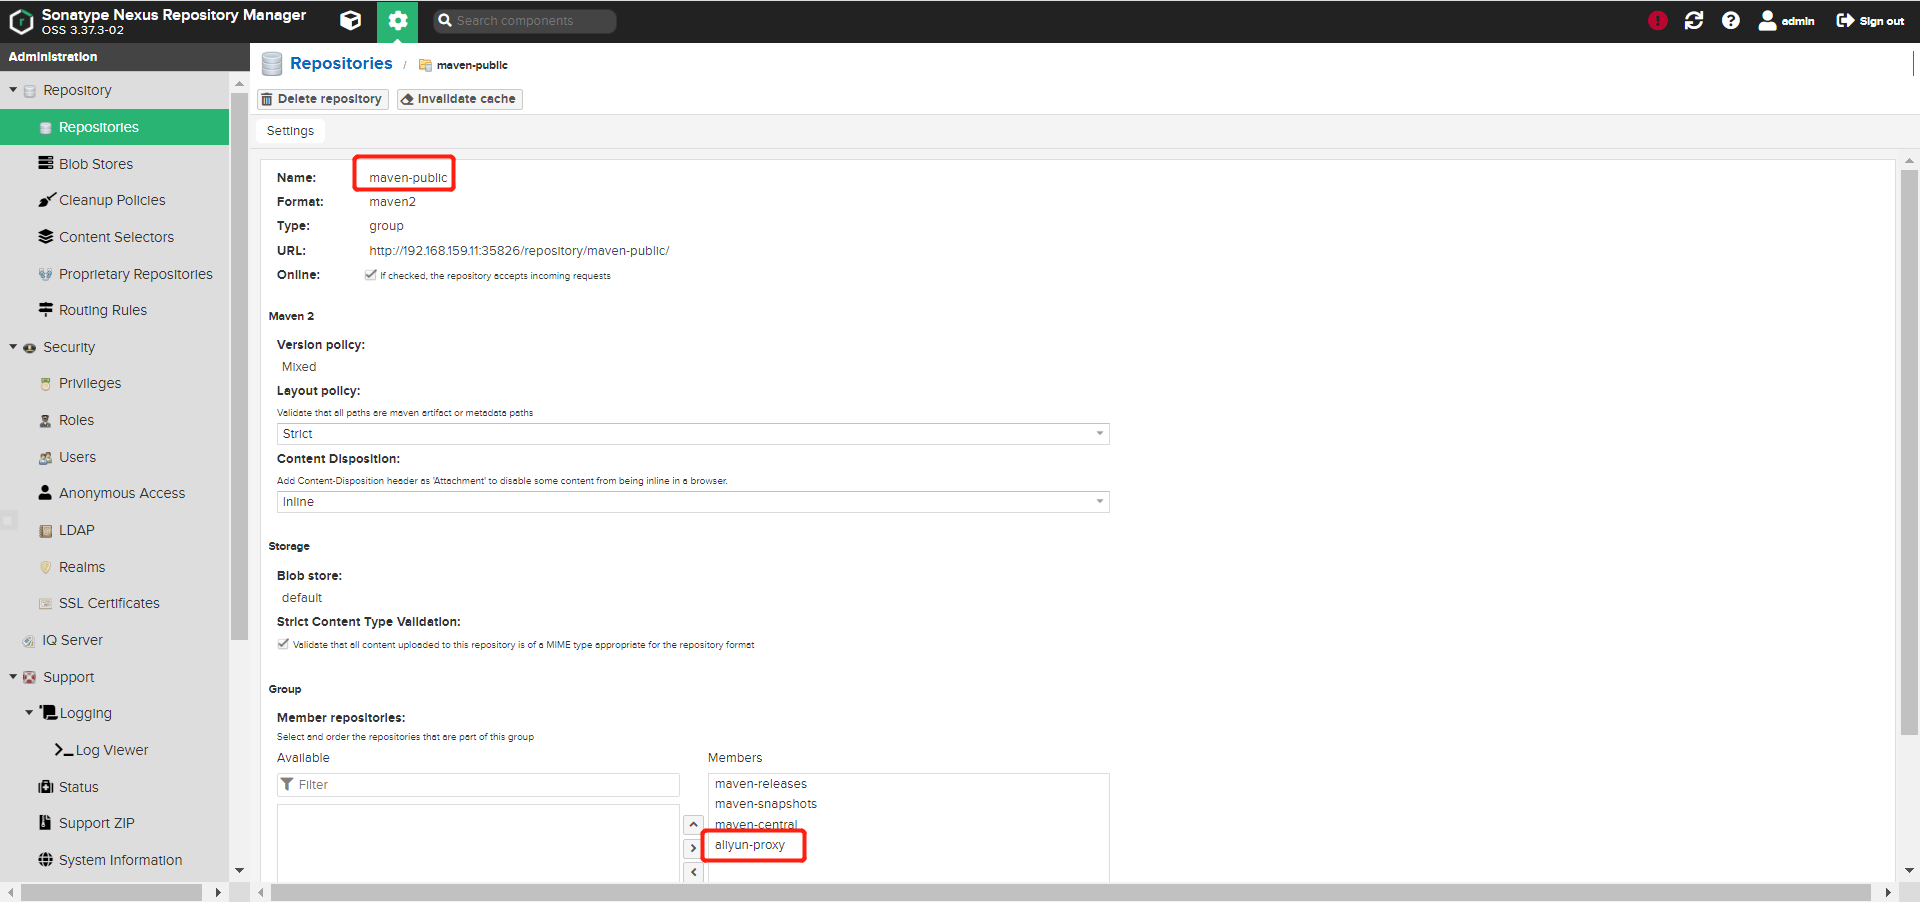
- maven-public:仓库分组,把上面三个仓库组合在一起对外提供服务,在本地 maven 的 settings.xml 文件或项目的 pom.xml 文件设置为该仓库地址,即可调用
仓库类型说明
- group:仓库组,起到了聚合的作用,在该组中的仓库都可以通过该组的 URL 进行访问
- hosted:私有仓库,顾名思义,用来存储自己的 jar 包
- snapshot:快照仓库
- release:本地项目的正式版本仓库
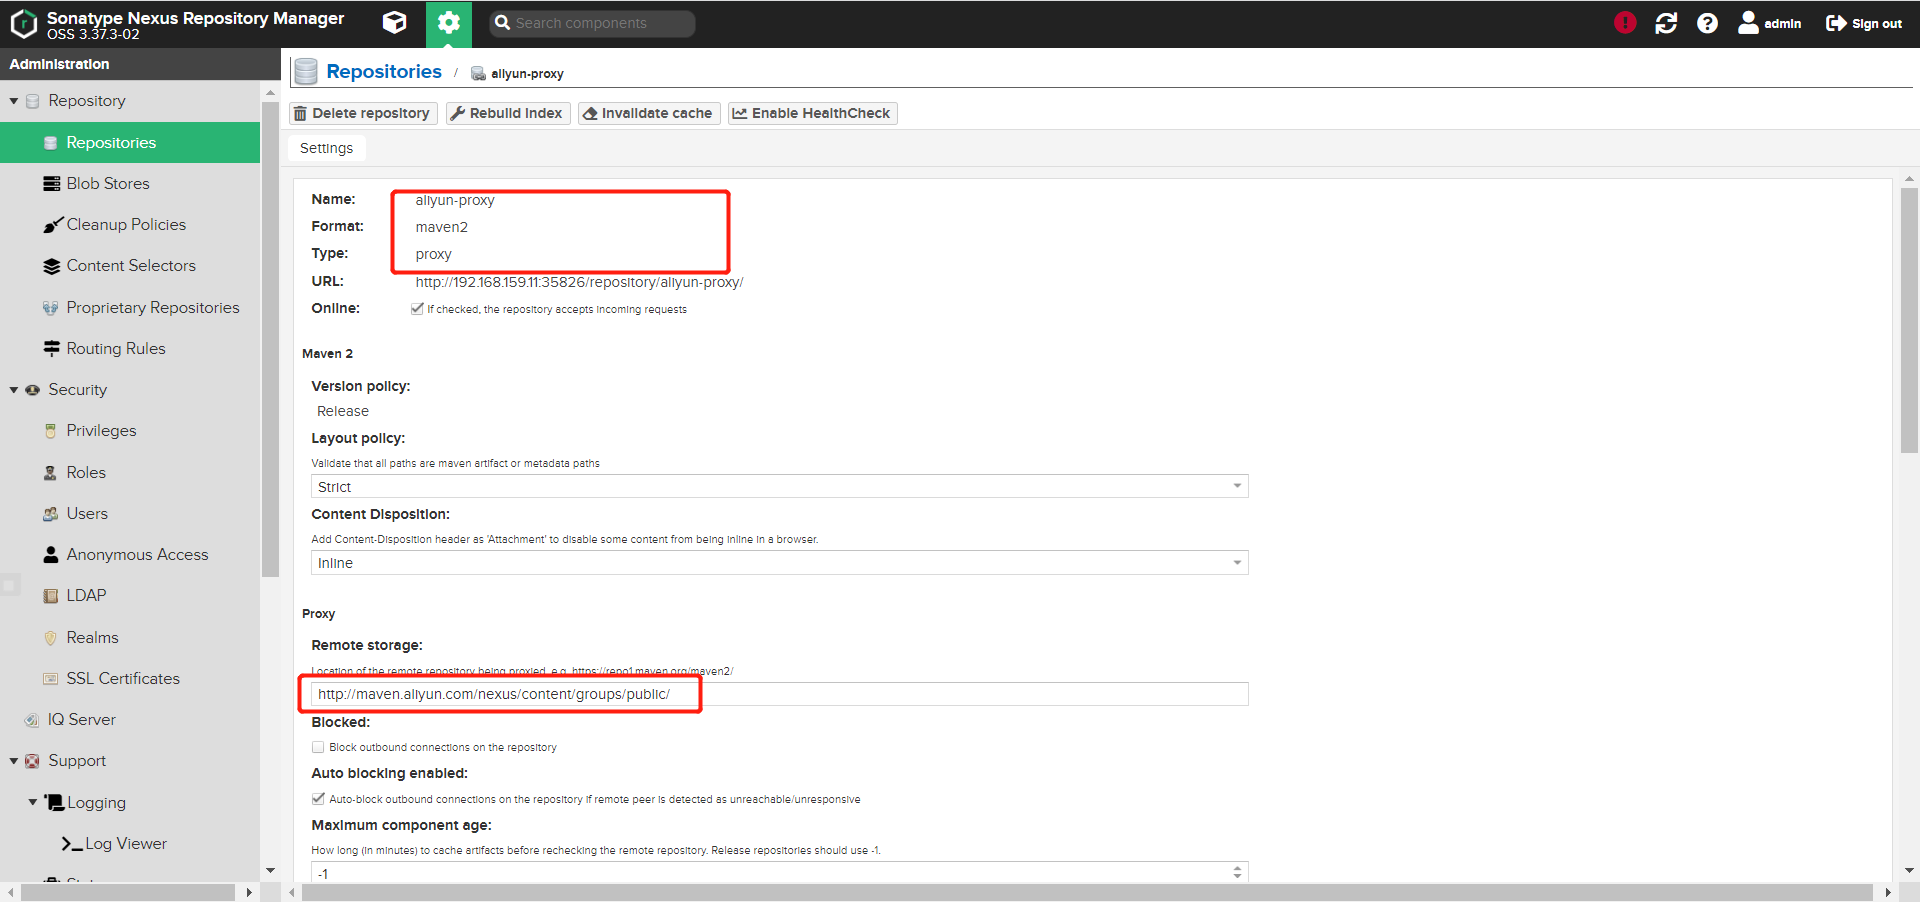
- proxy:代理,Nexus 的 maven-central 就是这种类型,代理地址为
https://repo1.maven.org/maven2/ ,默认会去该地址下拉取 jar 包
- central:中央仓库
新增代理仓库
创建仓库选择 maven2(proxy) 类型

添加到 maven-public

Maven 配置使用私服
要在本地 Maven 在私服拉取 jar 的方式有两种:
- settings.xml:全局配置模式
- pom.xml:项目独享模式
如果两种方式都配置了,那么以 pom.xml 文件配置为准。
当我们通过 Maven 使用 Nexus 的 maven-public 的时候,会按照以下方式顺序访问:
本地仓库
私服 maven-releases
私服 maven-snapshots
远程阿里 maven 仓库
远程中央仓库
通过 settings.xml 文件配置
1
2
3
4
5
6
7
8
9
10
11
12
13
14
15
16
17
|
<server>
<id>nexus</id>
<username>admin</username>
<password>changeme</password>
</server>
<mirror>
<id>nexus</id>
<name>cqm maven</name>
<url>http://192.168.159.11:35826/repository/maven-public/</url>
<mirrorOf>*</mirrorOf>
</mirror>
|
也可以设置为阿里的
1
2
3
4
5
6
| <mirror>
<id>alimaven</id>
<name>aliyun maven</name>
<url>http://maven.aliyun.com/nexus/content/groups/public/</url>
<mirrorOf>central</mirrorOf>
</mirror>
|
通过 pom.xml 文件配置
1
2
3
4
5
6
7
8
9
10
11
12
13
| <repositories>
<repository>
<id>mnexus</id>
<name>cqm nexus</name>
<url>http://192.168.159.11:35826/repository/maven-public/</url>
<releases>
<enabled>true</enabled>
</releases>
<snapshots>
<enabled>true</enabled>
</snapshots>
</repository>
</repositories>
|
同样也可以设置为阿里的
1
2
3
4
5
6
7
8
9
10
11
12
13
14
| <repositories>
<repository>
<id>alimaven</id>
<url>http://maven.aliyun.com/nexus/content/groups/public/</url>
<releases>
<enabled>true</enabled>
</releases>
<snapshots>
<enabled>true</enabled>
<updatePolicy>always</updatePolicy>
<checksumPolicy>fail</checksumPolicy>
</snapshots>
</repository>
</repositories>
|
使用 Maven 批量向 Nexus 上传
首先需要将 .m2/repository 下的相应 jar 包和 pom 文件 cp 出来,再进行 deploy。
1
2
| # -DrepositoryId 参数调用了 settings.xml 中 servers 块的账号密码进行认证
find . -name "*.jar" | awk '{ gsub("\.jar$","",$0); print "mvn deploy:deploy-file -Dfile="$0".jar -DpomFile="$0".pom -Dpackaging=jar -DrepositoryId=nexus -Durl=\"http://nexus-path\""}'
|

